There’s no better time to have fun creating a small posy or a larger bouquet for your special night.
Read MoreAll DIY Prom Bouqets


All DIY Prom Bouqets
There’s no better time to have fun creating a small posy or a larger bouquet for your special night.
Read MoreThere’s nothing like the first blooms of Spring to brighten your day. The only trouble is that many perennials, like lilacs and peonies, don’t last very long. That’s why it’s very important to preserve them quickly if you’d like to use them in the future.
Read More
As the Christmas season was coming to an end, I decided I wanted to enjoy our pretty tree a little longer. I knew I could get away with keeping our faux Balsam Hill Pine up through January dressed in its wintery guise, but what excuse did February have? That’s why, this year, I created a Valentine's Tree. Read on to see how I did it.

We created a pretty simple Christmas tree this year so the transition was easy. I first removed all of the Christmas balls but kept all the white lights and icicles. This step was very quick and with a semi-bare tree, I was able to then plan for February-appropriate decor.
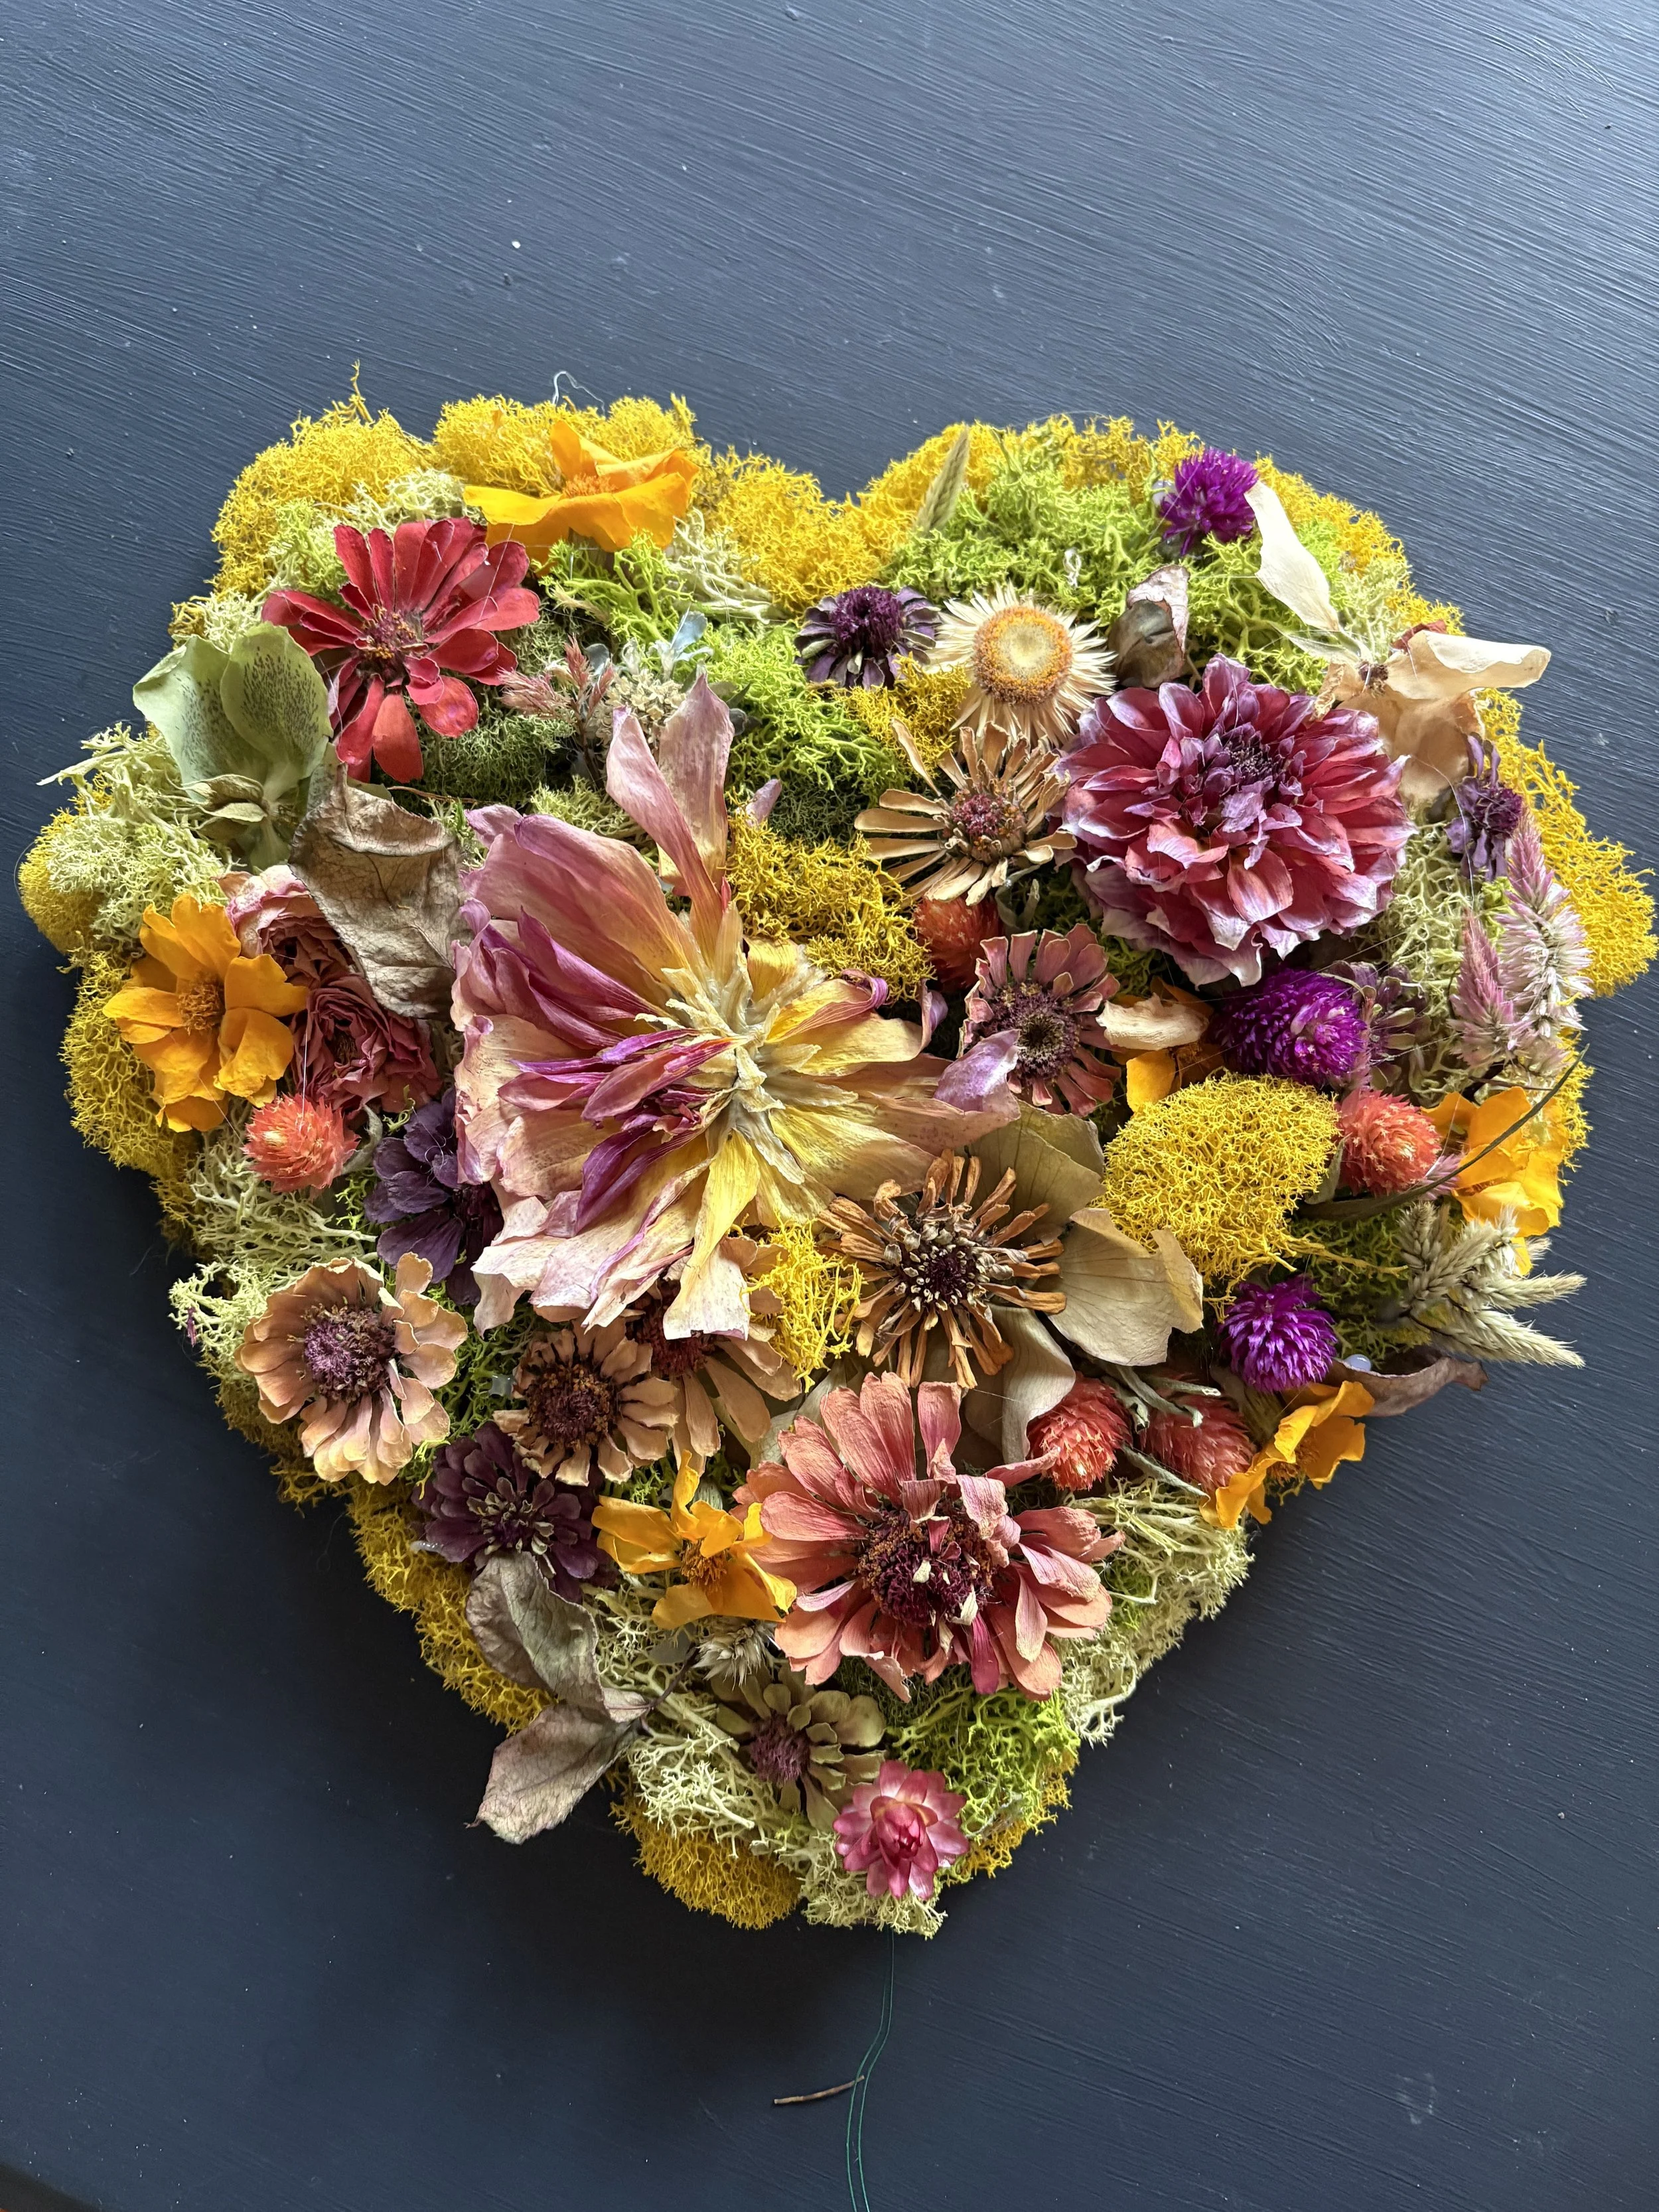
I considered keeping our glowing Moravian Star tree topper but decided that a Valentine's tree needed to better reflect Valentine’s Day. I considered a grapevine heart wreath covered in dried flowers but decided I’d like to just use found materials and make my own. This is how I did it.

I took an old cardboard box and cut two identical free-form hearts. I then hot-glued a 10” doubled-up piece of floral wire about 4” deep inside the two panels and extended it out the bottom, so that I’d have something to wrap around the tree’s top branch. If I do it again, I will also extend the wire from each side so the heart has more stability when topping the tree.
Once the wire is secured, hot glue the hearts together. This step helps the topper to be more ridged and stable.

Start by designing one side of the heart with your dried flowers and moss. I used my professional-grade Ryobi glue gun, some reindeer moss, and the dried flowers I harvested this year. If you want to learn how to dry your own flowers, see my blog: Learn how to dry your own garden flowers. I didn’t have much of a design or plan, but I just kept filling in the cardboard as I went around the heart and eventually, one side of my heart was completely covered.

When I finished side 1, I realized leaving the second side of the heart blank wouldn’t look very nice from the side view, so I cut up a coloring book, quickly glued it to the surface of the heart, and glued some leftover moss around the edges to finish it off. In retrospect, I would cover this side first with contact paper or something simple to make the job easier. You could also fill the back side with moss if you have it.

Here is the result. Not bad for a trial run. Later I’ll show you how it looks on the tree.
Now the rest of the tree needed some LOVE-ly decor. I found these pretty heart ornaments in rose gold online. They are sold in sets of 45 so I only ordered one set. You can also get them in silver, pink, gold, red, and a pink, red & white combo.

I also found some vintage Valentine ornaments to add some character to my tree. There are many types of interesting card ornaments to choose from on Amazon, so look around. Some are more childish which would be nice if you are creating this for your children or grandchildren.

When all the little rose gold hearts and vintage Valentines were hung, I added a few large dried flowers and some colorful felt ball garlands that I had lying around.
I am very pleased with how this turned out and I’m happy I started a new tradition for our home. Don’t worry, if you’ve already removed your Christmas tree this year, you can plan for next February or grab some fallen branches from outside and place them in a garden pot to make a smaller Valentine’s Branch Tree. Anything is possible. Please share your thoughts in the comments below.


How to host a fresh flower or bouquet bar.
Read More
Sweet Occasions, Peddlers Village Flower Bar
How to host a DIY flower bar event in your home of event space.
Read More