There’s nothing like the first blooms of Spring to brighten your day. The only trouble is that many perennials, like lilacs and peonies, don’t last very long. That’s why it’s very important to preserve them quickly if you’d like to use them in the future.
Read More
How An Invitation Can Tell Your Love Story
Today it seems most big events have a theme or a distinguishing thread that evokes an emotion or tells a story. However, not everyone wants a theme. Instead…
Read More
How to Design a Valentine Tree
Why I Designed a Tree FIlled with Love
As the Christmas season was coming to an end, I decided I wanted to enjoy our pretty tree a little longer. I knew I could get away with keeping our faux Balsam Hill Pine up through January dressed in its wintery guise, but what excuse did February have? That’s why, this year, I created a Valentine's Tree. Read on to see how I did it.

Transitioning a Christmas Tree
We created a pretty simple Christmas tree this year so the transition was easy. I first removed all of the Christmas balls but kept all the white lights and icicles. This step was very quick and with a semi-bare tree, I was able to then plan for February-appropriate decor.
Making a Valentine's Tree Topper
I considered keeping our glowing Moravian Star tree topper but decided that a Valentine's tree needed to better reflect Valentine’s Day. I considered a grapevine heart wreath covered in dried flowers but decided I’d like to just use found materials and make my own. This is how I did it.

Start with a basic shape
I took an old cardboard box and cut two identical free-form hearts. I then hot-glued a 10” doubled-up piece of floral wire about 4” deep inside the two panels and extended it out the bottom, so that I’d have something to wrap around the tree’s top branch. If I do it again, I will also extend the wire from each side so the heart has more stability when topping the tree.
Once the wire is secured, hot glue the hearts together. This step helps the topper to be more ridged and stable.

Designing the front of your heart topper
Start by designing one side of the heart with your dried flowers and moss. I used my professional-grade Ryobi glue gun, some reindeer moss, and the dried flowers I harvested this year. If you want to learn how to dry your own flowers, see my blog: Learn how to dry your own garden flowers. I didn’t have much of a design or plan, but I just kept filling in the cardboard as I went around the heart and eventually, one side of my heart was completely covered.

Designing side 2
When I finished side 1, I realized leaving the second side of the heart blank wouldn’t look very nice from the side view, so I cut up a coloring book, quickly glued it to the surface of the heart, and glued some leftover moss around the edges to finish it off. In retrospect, I would cover this side first with contact paper or something simple to make the job easier. You could also fill the back side with moss if you have it.

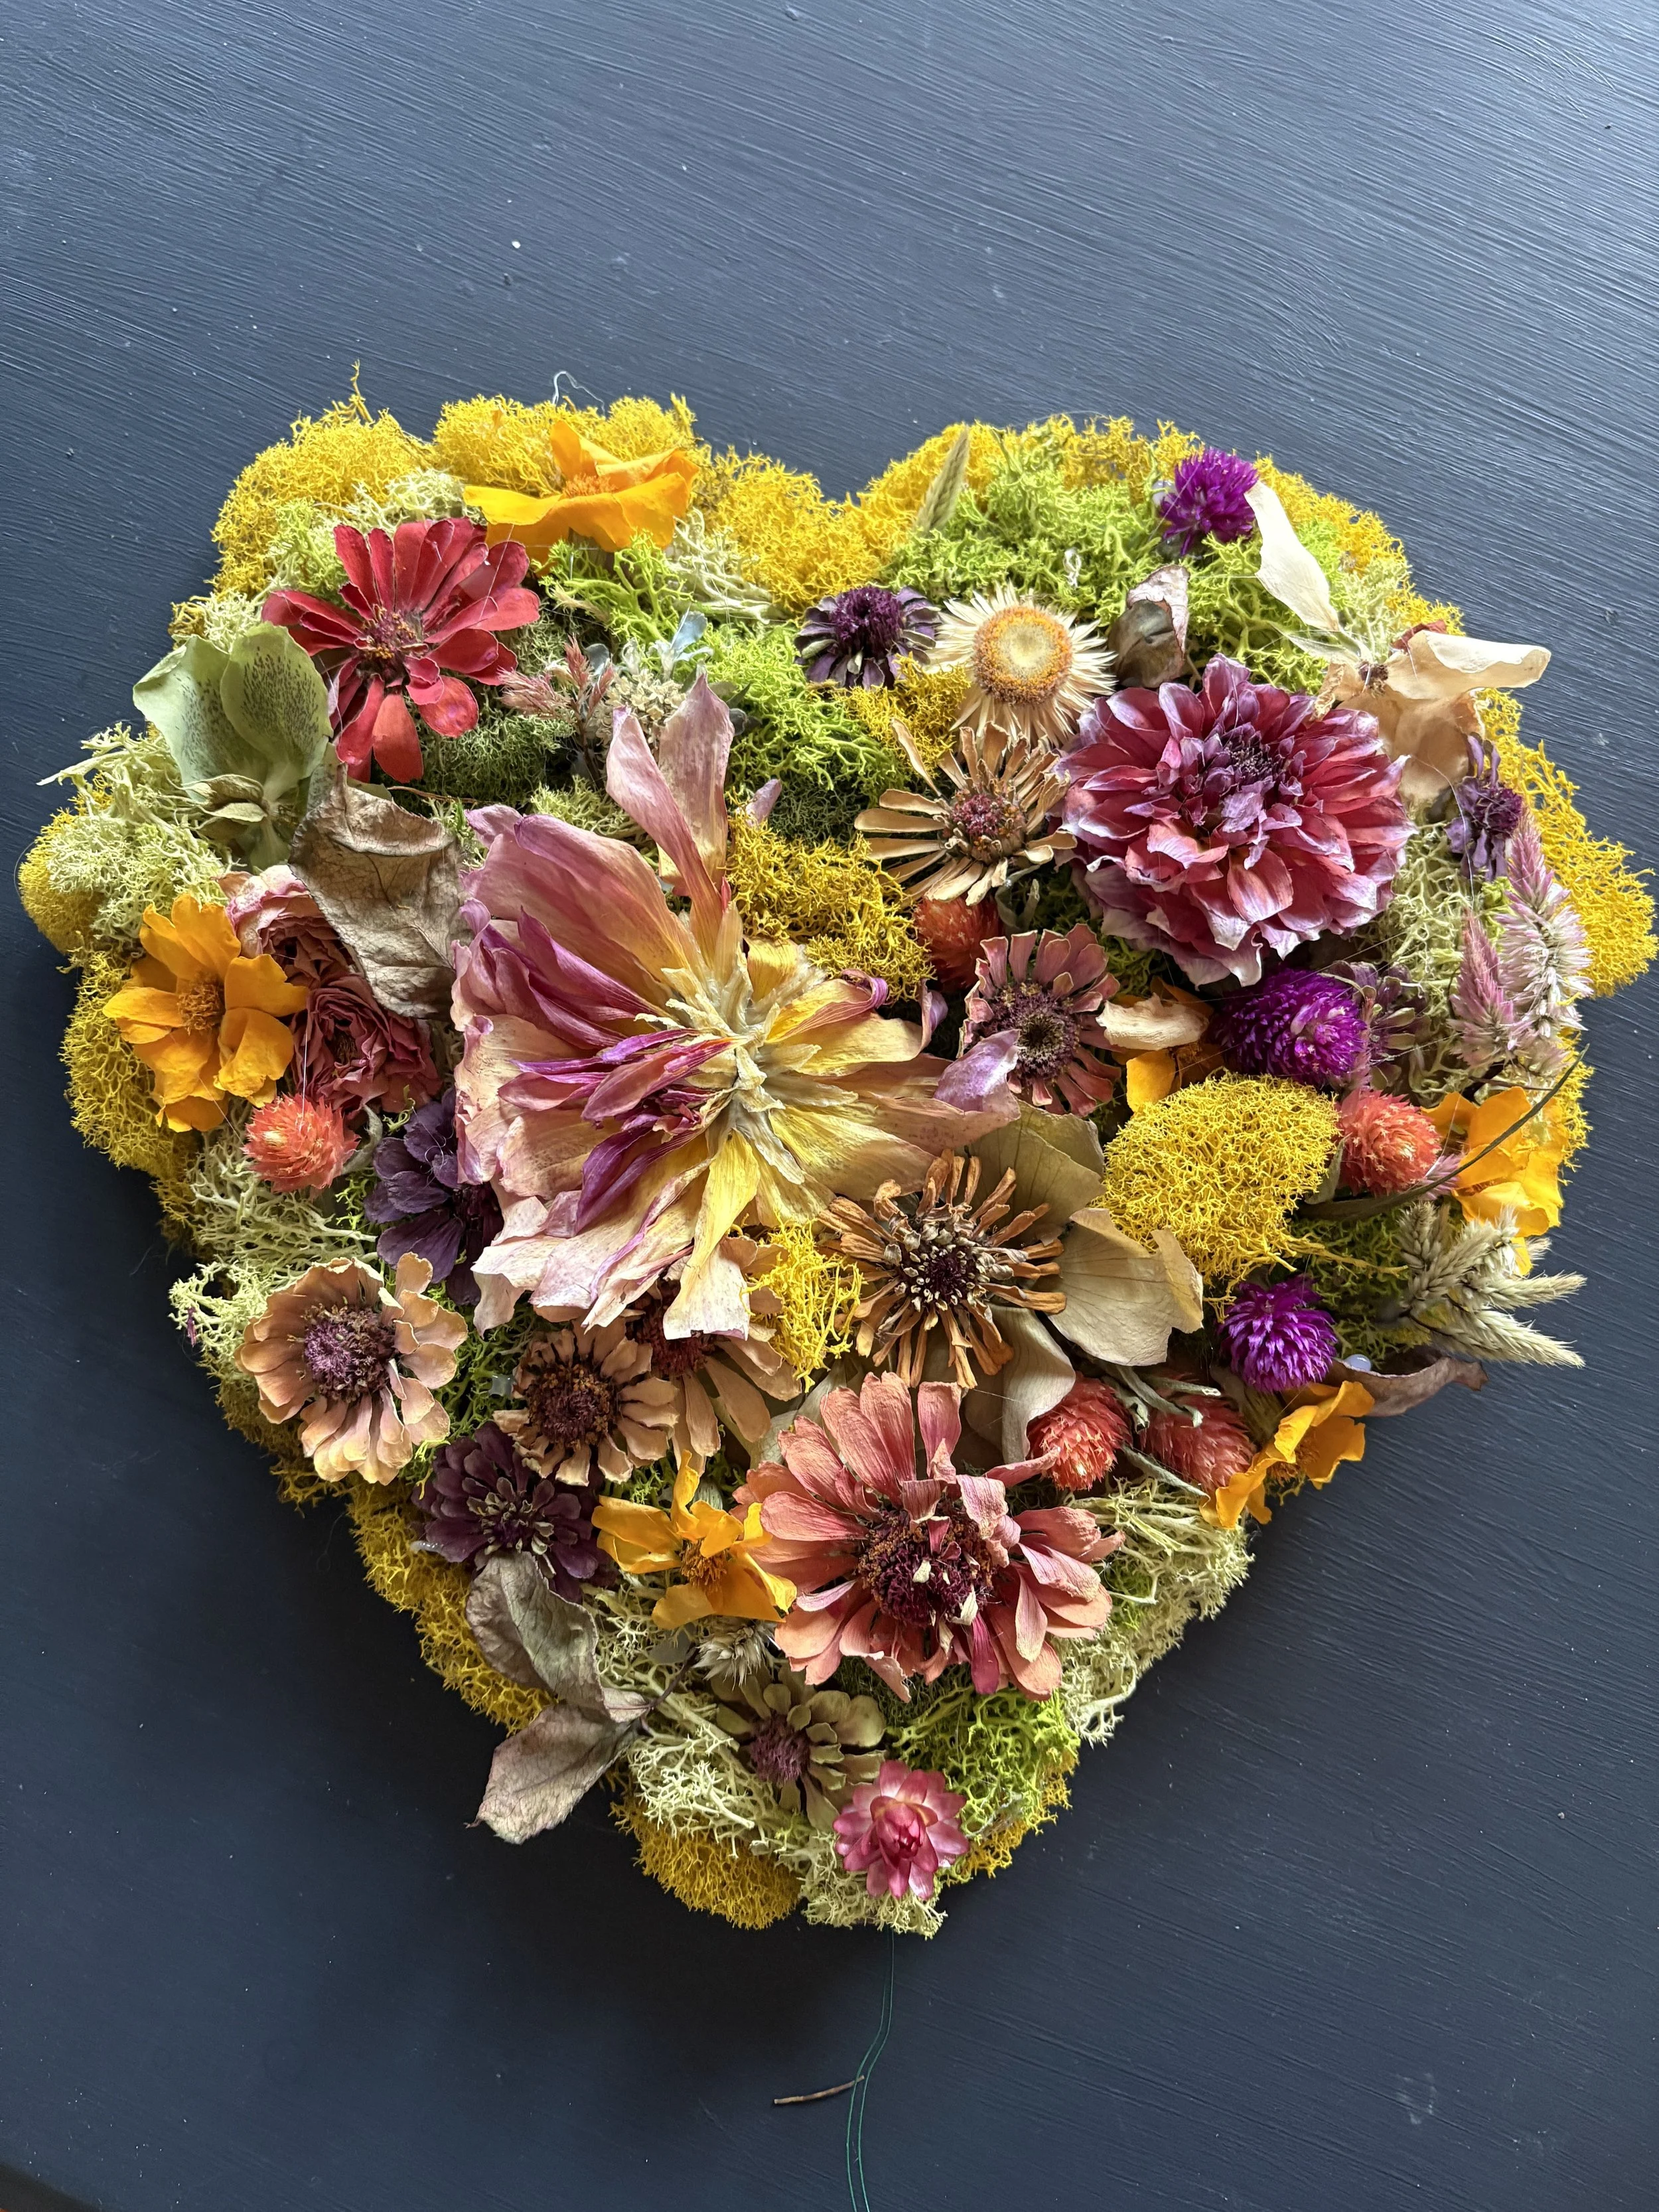
The Heart-Shaped Tree Topper
Here is the result. Not bad for a trial run. Later I’ll show you how it looks on the tree.
Hanging hearts on the Tree
Now the rest of the tree needed some LOVE-ly decor. I found these pretty heart ornaments in rose gold online. They are sold in sets of 45 so I only ordered one set. You can also get them in silver, pink, gold, red, and a pink, red & white combo.

Accenting with Vintage Valentine Cards
I also found some vintage Valentine ornaments to add some character to my tree. There are many types of interesting card ornaments to choose from on Amazon, so look around. Some are more childish which would be nice if you are creating this for your children or grandchildren.

The Unveiling
When all the little rose gold hearts and vintage Valentines were hung, I added a few large dried flowers and some colorful felt ball garlands that I had lying around.
I am very pleased with how this turned out and I’m happy I started a new tradition for our home. Don’t worry, if you’ve already removed your Christmas tree this year, you can plan for next February or grab some fallen branches from outside and place them in a garden pot to make a smaller Valentine’s Branch Tree. Anything is possible. Please share your thoughts in the comments below.

How to Create Oyster Shell Necklaces
Oyster Shells - All the Rage
Oyster shell art seems to be all the rage recently, and I’ve enjoyed learning how to create small jewelry dishes with these shells.
When friends of mine decided to design oyster dishes during our fall beach getaway, I thought why not try to make a few pendant necklaces instead? I couldn’t help but notice that several of the smaller oysters we had collected, already had natural holes, so it was the perfect opportunity to try.
Cleaning and Prepping the Oyster Shells
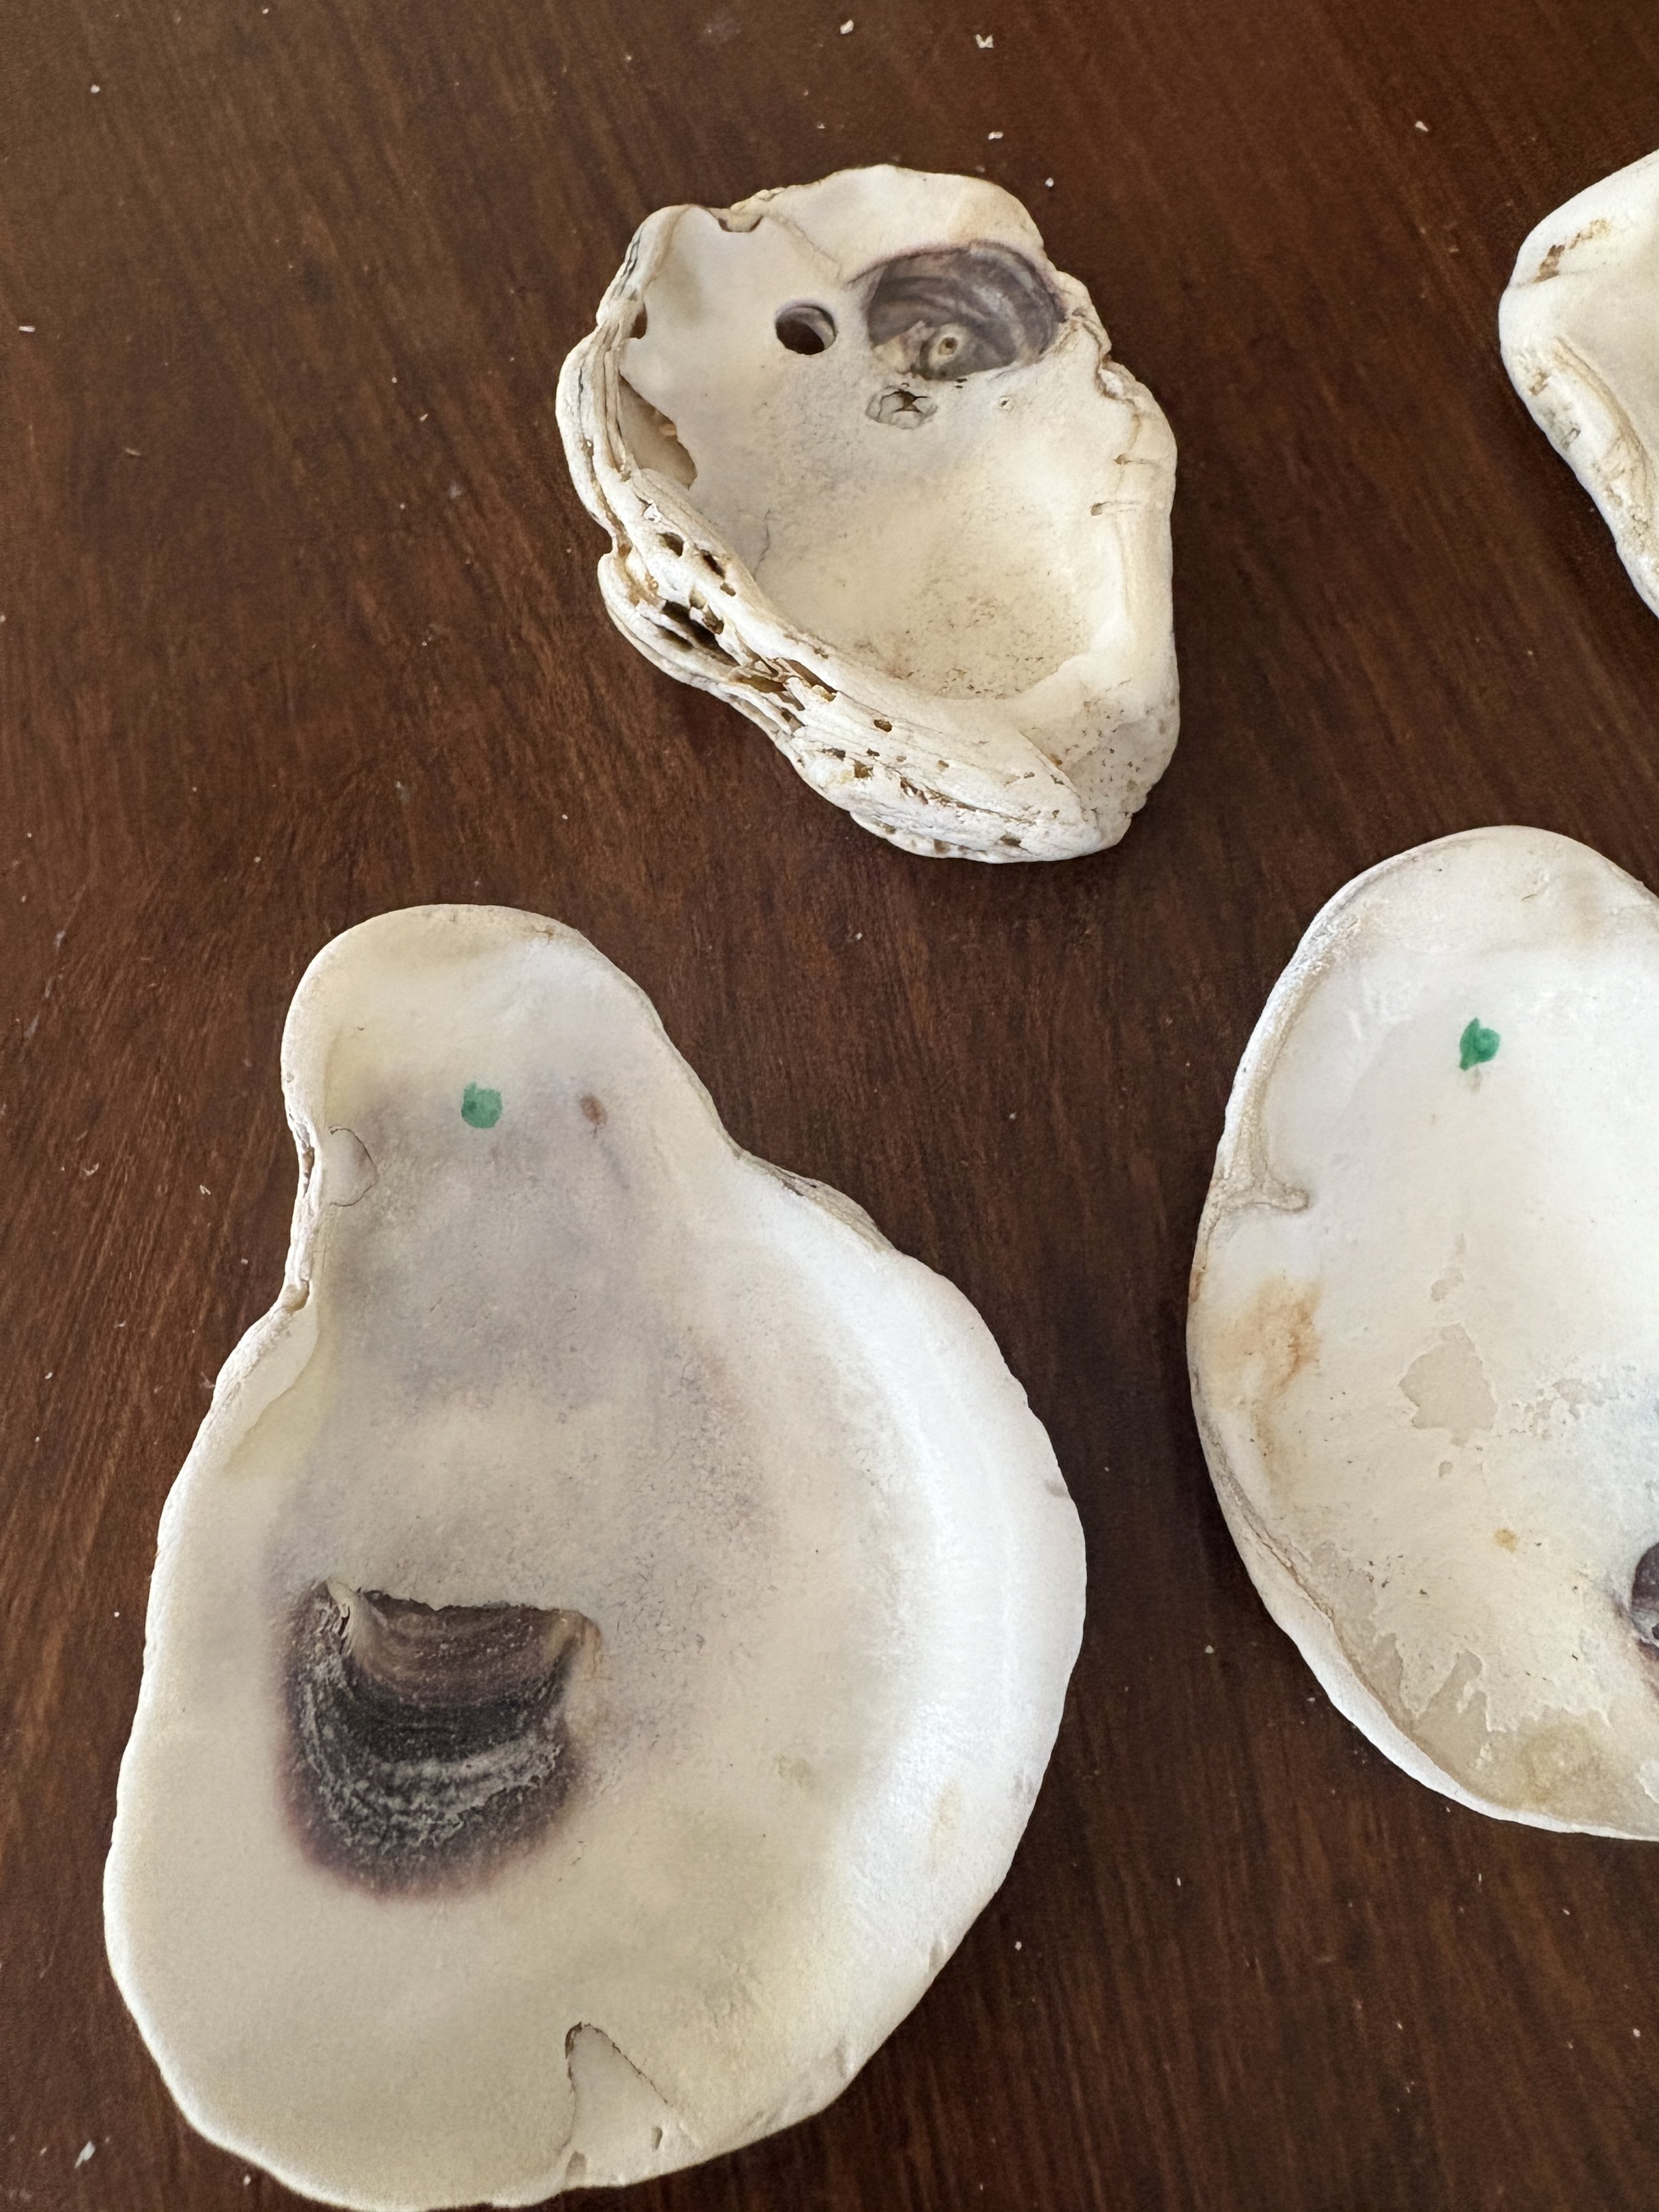
While on a weekend trip to St. Michaels, MD, I found a bucketful of oysters for sale. I rummaged until I found 10 perfect pendant-sized shells and brought them home to create some gifts. If you don’t have a beachy source to gather some oysters, you can always buy some online.
When home, I soaked the shells in a bucket of water with a bit of bleach for about an hour. I did this to remove any sand and contaminants that might still be lingering on the shells. The next step is to set the shells out to dry thoroughly so you can use a marker to indicate where you’d like to drill a hole, if there isn’t a natural one already.
Drilling the Hole
After you’ve marked the spot that you’d like a hole, decide on the size hole you like and match up the correct drill bit. I purchased 1.5mm round leather cord for my necklaces, but you can use an existing gold or silver chain too.
Set up your drilling station by placing the shell on a small piece of wood and keep a little dish of water nearby. You’ll want to wet the drill bit slightly and drop a few drops of water directly on the shell. This helps eliminate friction when drilling. If you do not have a drill, here is a good drill for small crafts.

Cover the Blemishes
After you’ve successfully drilled the holes and you know your shell did not split or break, you are ready to cover the dark blemishes on the inside surface. I have been doing this with white nail polish but a good opaque white paint works well too. You probably have one or the other lying around. You don’t want to skip this step because these dark blemishes will show up under your designs and ruin the overall look.
Adhere Paper Napkins
Now comes the fun part. Before you begin, you’ll want to acquire a variety of pretty paper napkins. These can coordinate with a holiday or season, a getway weekend, or maybe they are pulled from a collection of the prettiest paper napkins you’ve acquired or stolen from dinner parties all year long!!
Decide which design you’d like to use for your necklace or small dish. If your napkin is 2ply, be sure to carefully remove the underlayer so that only the printed layer remains. then cut the napkin with a scissor in the rough shape of the shell. Make sure your cut is larger than the shell itself. I try to make my cuts at least 3/4” larger on all sides.

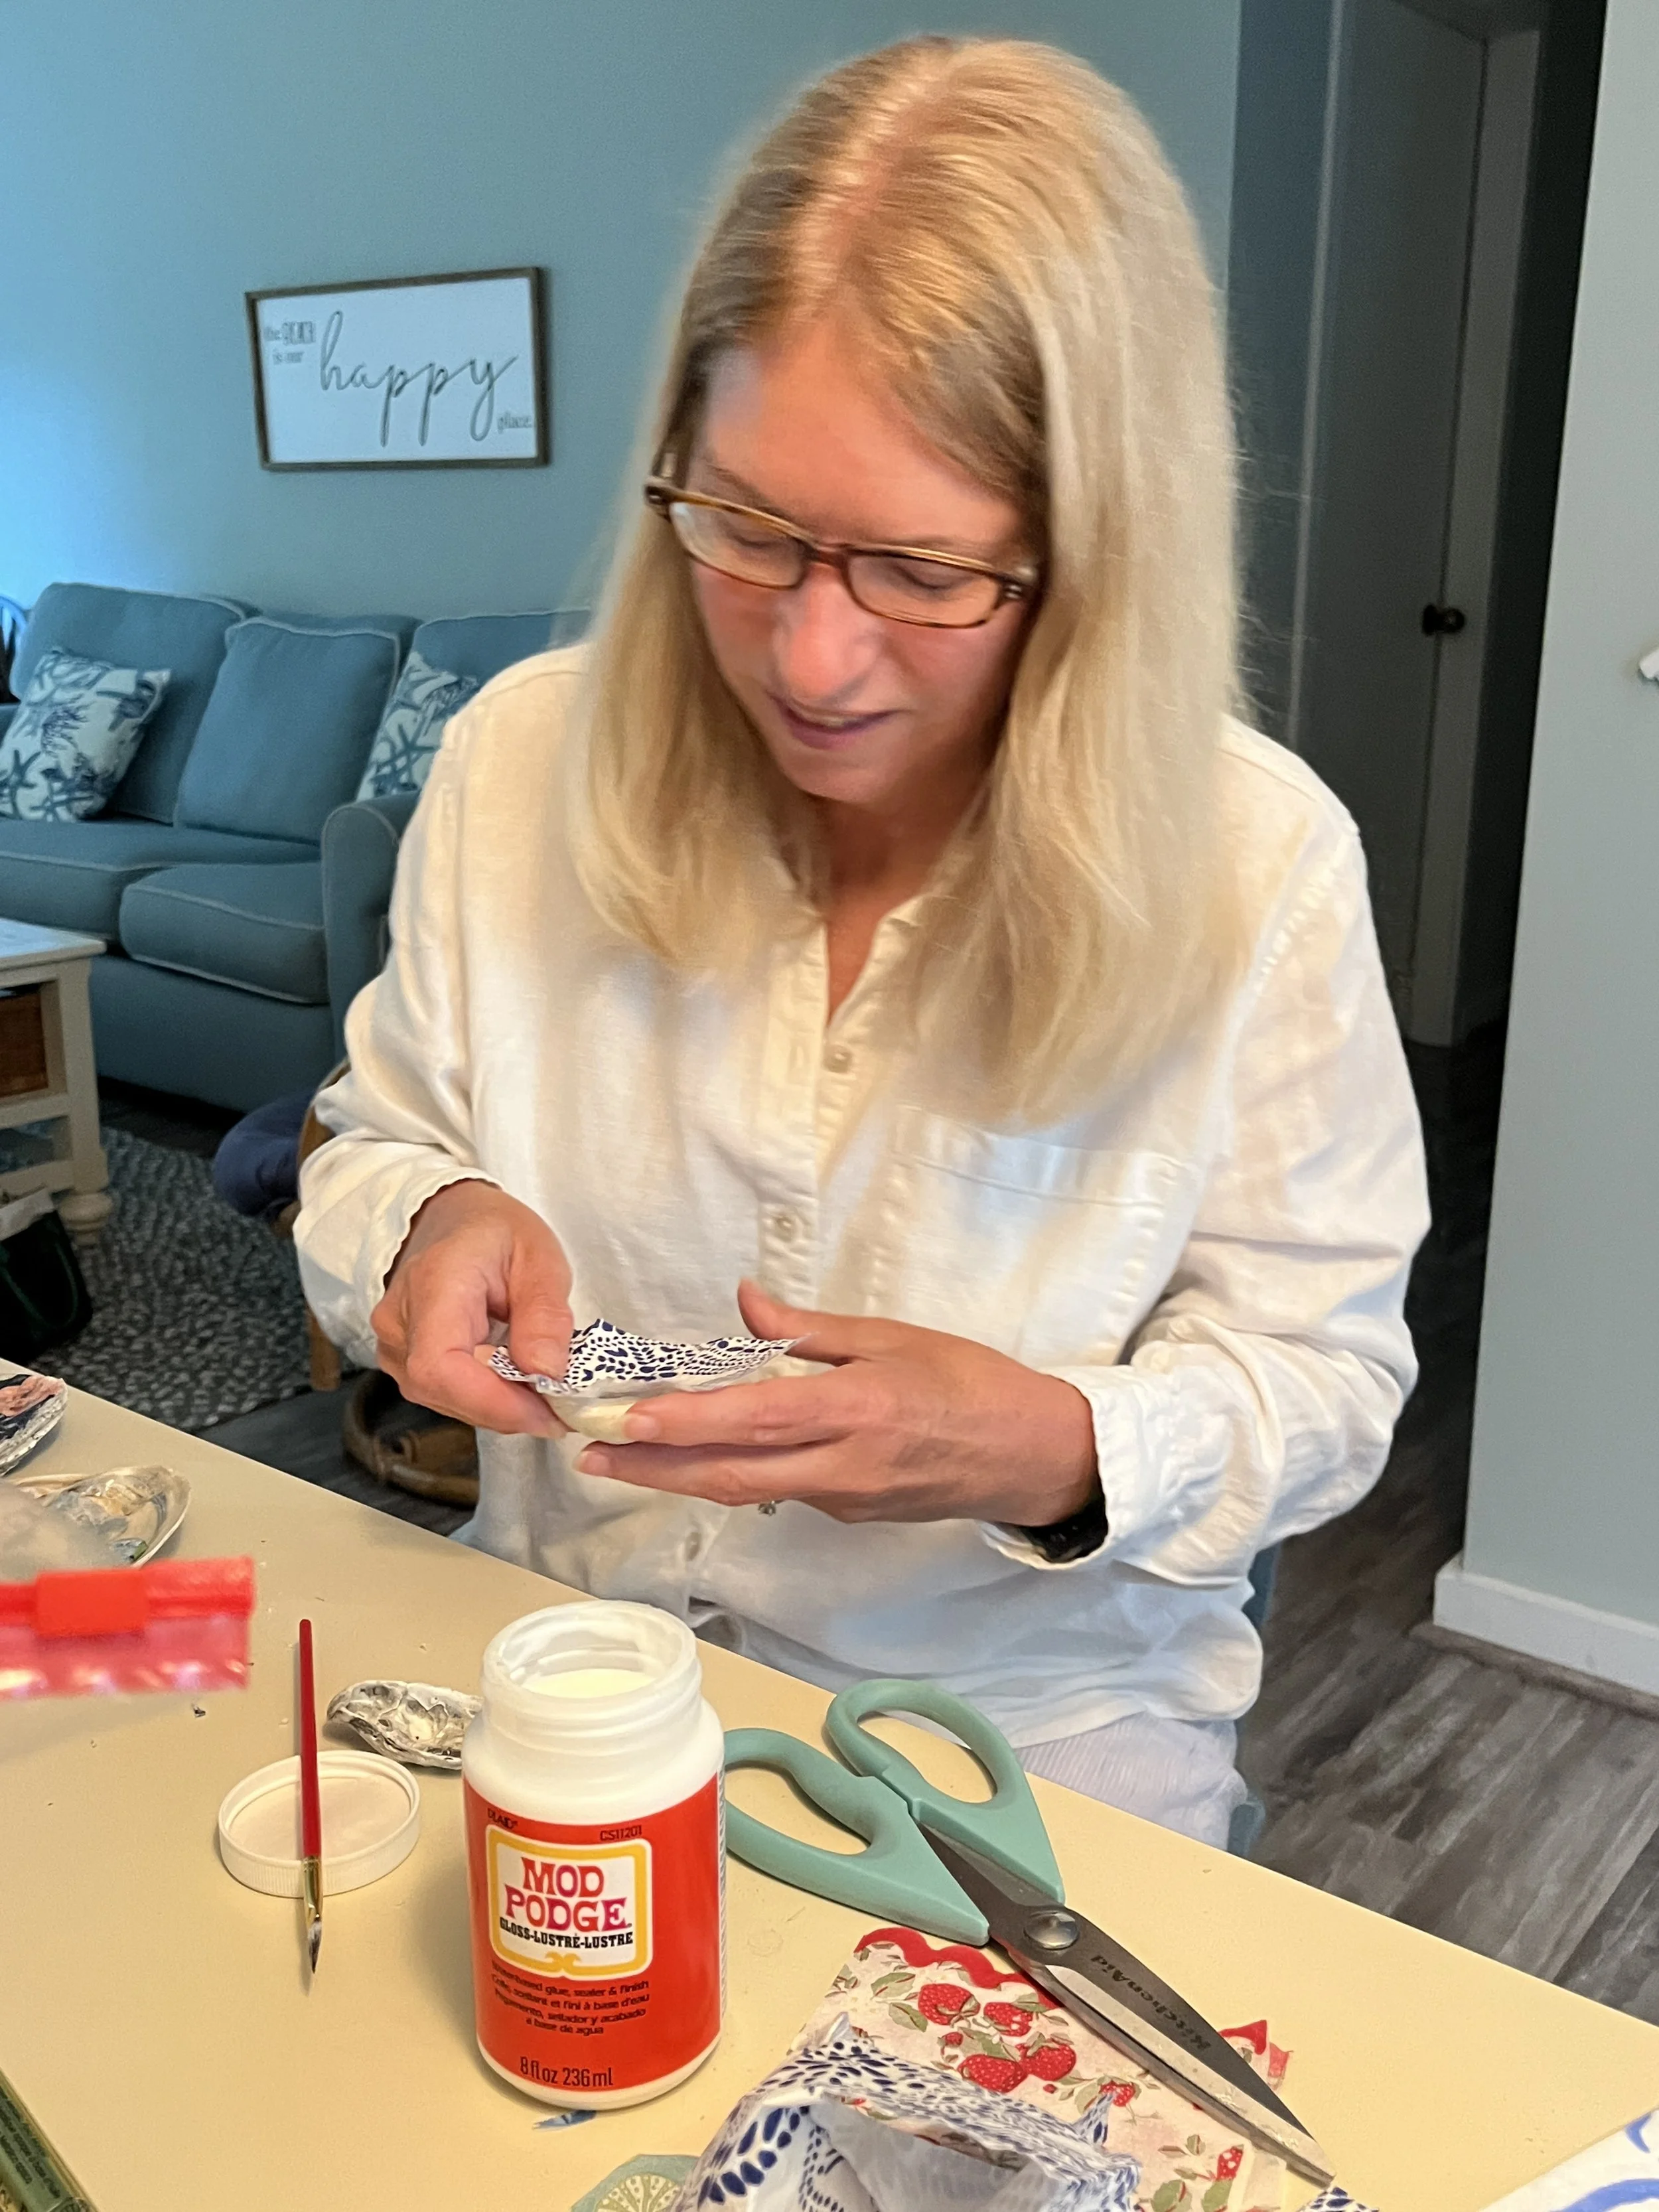
Apply Mod Podge
Next, you’ll take your small paint brush and apply Mod Podge to the inside surface of the shell and let it set for about 30 seconds. Then, gently lay your napkin inside the shell cavity, face side up. It will crinkle a bit but lightly press it down with your fingers so that it sticks to the sides and bottom. Now, coat your brush with Mod Podge, and brush it over the napkin until every piece is glued down. You can choose matte or gloss Mod Podge depending on the look you prefer. Do your best to smooth out all the creases with your brush and when all of the inside surface is covered, allow your shell to dry for a few hours. The excess paper napkin will still be all around the edges and that’s okay, you will tear it away once it’s thoroughly dry.
Tear Edges
When your shell has completely dried it will not look that great, in fact it will look unfished. This is normal, the next step is what brings it to life.
Carefully hold your shell and start tearing off the excess paper napkin as gently as you can, all around the edges. If you tear too far and remove some from the inside, that’s okay, just patch the section with a tiny brush of Mod Podge if necessary to secure it to the shell and keep moving. You want to get it to where there are no loose edges of the paper at all around the perimeter. If you patch, be sure to let dry again.

Apply Gold Leaf Edge
Once every edge is torn and everything is dry, vigorously shake your gold leaf (or silver leaf) pen and begin drawing around the edges. You’ll want to shake the pen, and dab it a few times on a napkin to get the gold leaf flowing. Be sure to buy gold leaf and not just a gold marker because the ink is different and you won’t get the metallic leafing effect. Of course, if you are going for a different look and don’t want metallic, you can use a paint marker of any color. But again, be sure your paint marker is opaque and not just a typical marker because you want the outlining edge to cover over the edge of the napkin and define the shell. Have fun with this step by taking the pen into the design or highlighting edges on the back of the shell, as I often do.


Loop the Cord Through
The last step is to string the leather cord through the hole. You can tie it off with a simple slip knot if you’d like, or add beads to finish off the look.

Please attach photos of the necklaces you make after reading this blog. Have fun. There is a full supply list below.


How to Create a Stunning Centerpiece
How to create a stunning winter centerpiece
Read More
Dried flower & Dried Lime Grapevine Wreath. This wreath features some Wooden Flowers.
Preserve Flowers for Creative Projects
After designing and creating something special with flowers, I always hate to see them whither and eventually die. Recently I began preserving the flowers I love so that I can use them again in the future. This autumn I’ve been practicing a lot with the beloved Dahlia Flower and I’ve had fantastic results. I’ve even been known to disassemble a bouquet and create a small everlasting wreath with its components to help better commemorate the event.
Various Methods of Drying Flowers
Sometimes, when I have abundant, hearty stems like lavender, I dry traditionally by hanging small bunches upside down. Other times, with flowers like hydrangea and tiny spray roses, I find I can just place them in a vase without water and wait. Often they’ll even dry with a lovely sculpture-like essence, creating art without any effort at all.
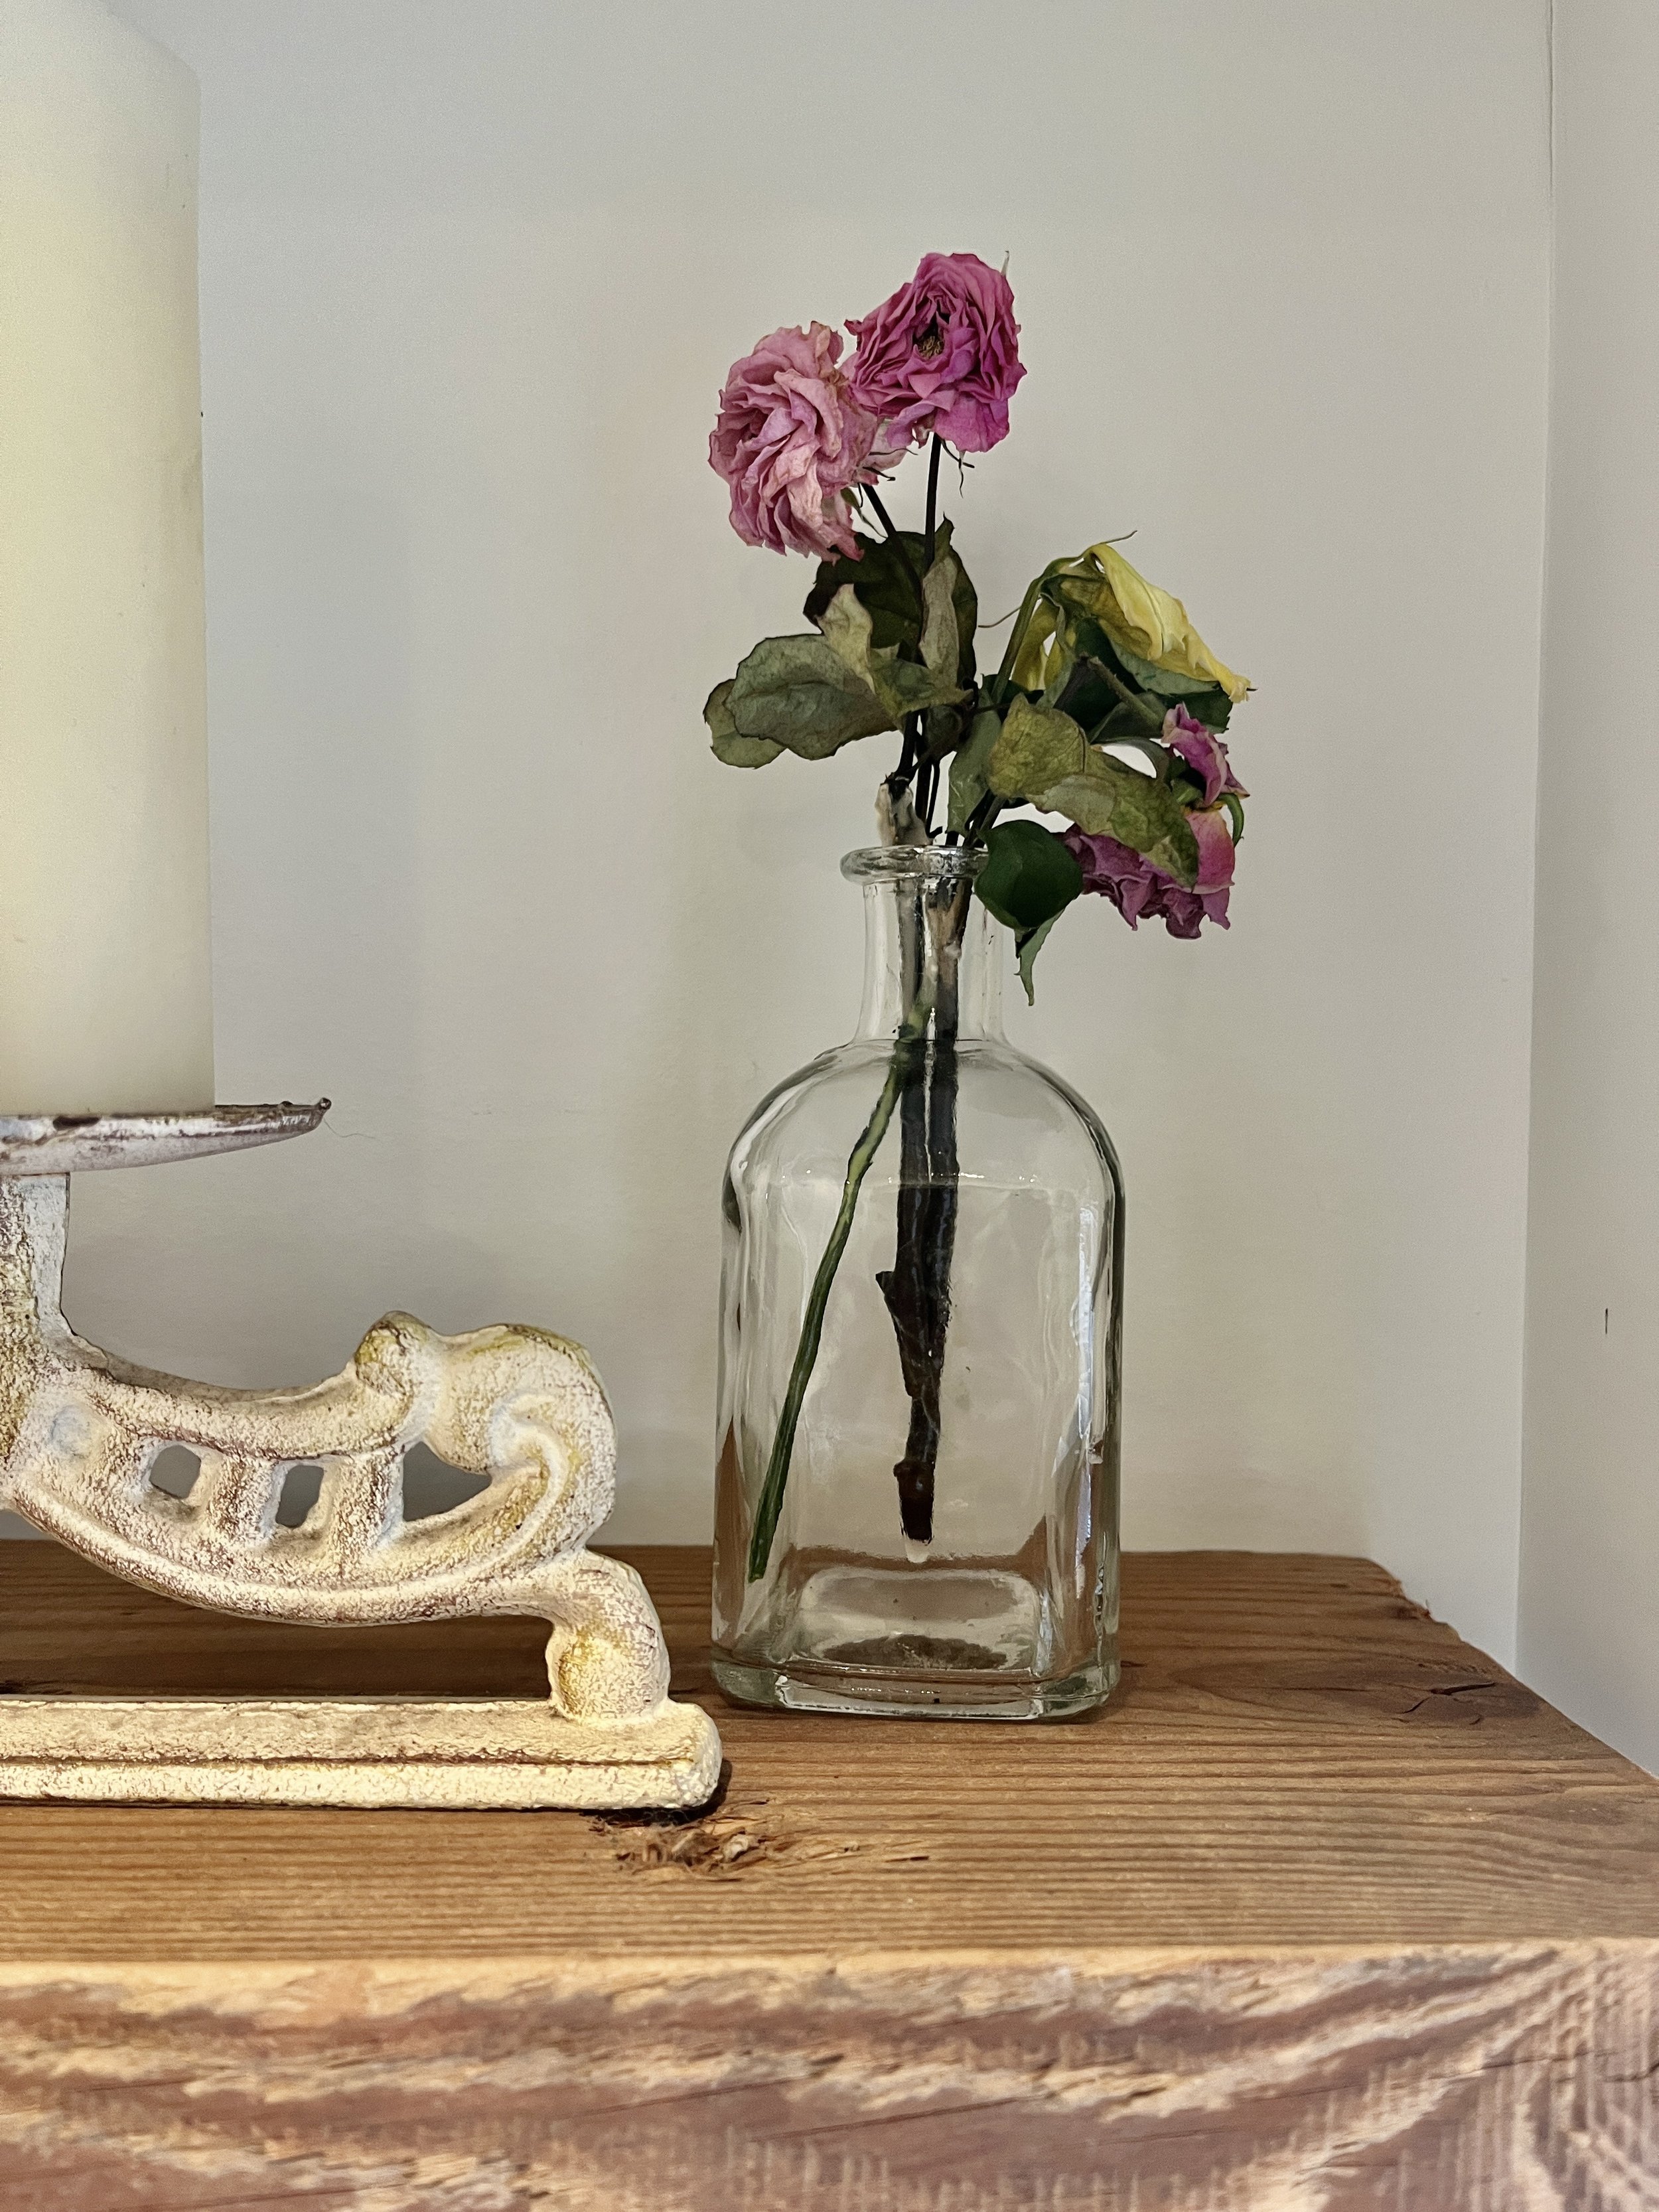
Dried spray roses in simple vase.
Preserving Flowers with Silica crystals
Another method for preserving flowers is to cover them in Silica Crystals and allow the crystals to extract the moisture from the flowers.
I like to use my favorite Micro Pruning Snips to remove foliage and stems unless you want the stems for your project. I then sprinkle about 1” of Silica Gel Crystals into the bottom of a Rubbermaid container so that it evenly covers the whole surface. I then carefully place the flowers either face up or face down on that layer of Silica Crystals, spacing them tightly, being sure they are not touching. Once the flowers are laid out in the container go ahead and pour more Silica Crystals over them and completely cover every part of the flower. Next, cover the container tightly with the matching lid and place it in a cool, preferably dark, area for about a week. Some flowers take less than a week to dry, so feel free to experiment.

Delicate dried Dahlia Flowres.
Removing preserved flowers
For this, I recommend buying a small, slotted spatula similar to the one below so you can retrieve the smaller flowers one at a time. I gently scoop under each flower and lift allowing the Silica Crystals to fall back into the container. I lightly tap each flower on all sides to release any remaining crystals. I place all the newly preserved flowers onto a tray side by side and when I am sure there is no moisture, I store them in a container with air vents as a last measure to ensure they don’t get moldy.

Gently scooping dried Dahlia Flowers out of the Silica Gel Crystals.
Creating with Dried Flowers
Once you’ve preserved enough flowers have fun creating wreaths, flower branches, or even small pieces of wood (pictured below) and use them as table cards or gift toppers. Or do as I do and just place small dried groupings in a pretty vase and enjoy them for a long time. If you do want to create wreaths or toppers, I recommend buying a quality glue gun. I do a lot of designing so I purchased a professional-grade (cordless) Ryobi Glue Gun and I love it. It does get very hot so be careful when gluing, but honestly not having a cord to deal with is so nice. The battery and charger are included.

Mini spray roses glued to a tiny piece of wood.
I hope you enjoy preserving all the pretty flowers you encounter. Feel free to drop me a line and share your creations. -Kimberly
Your Supply list:
Hearty Fresh Flowers (without a lot of delicate & loose petals)
Micro-Tip Pruning Snips
Rubbermaid Storage Containers with Lids
Silica Gel Crystals
Mini Slotted Spatula
Professional-grade Glue Gun

How to Make Sentimental Easter Eggs
HOW TO MAKE SENTIMENTAL EASTER EGGS
Read More
The Philadelphia Flower Show Water Feature
How to Enjoy The PHS Philadelphia Flower Show
I am sure you've heard of The Philadelphia Flower Show. Flower enthusiasts come from far and wide to this grand event every year.
Read More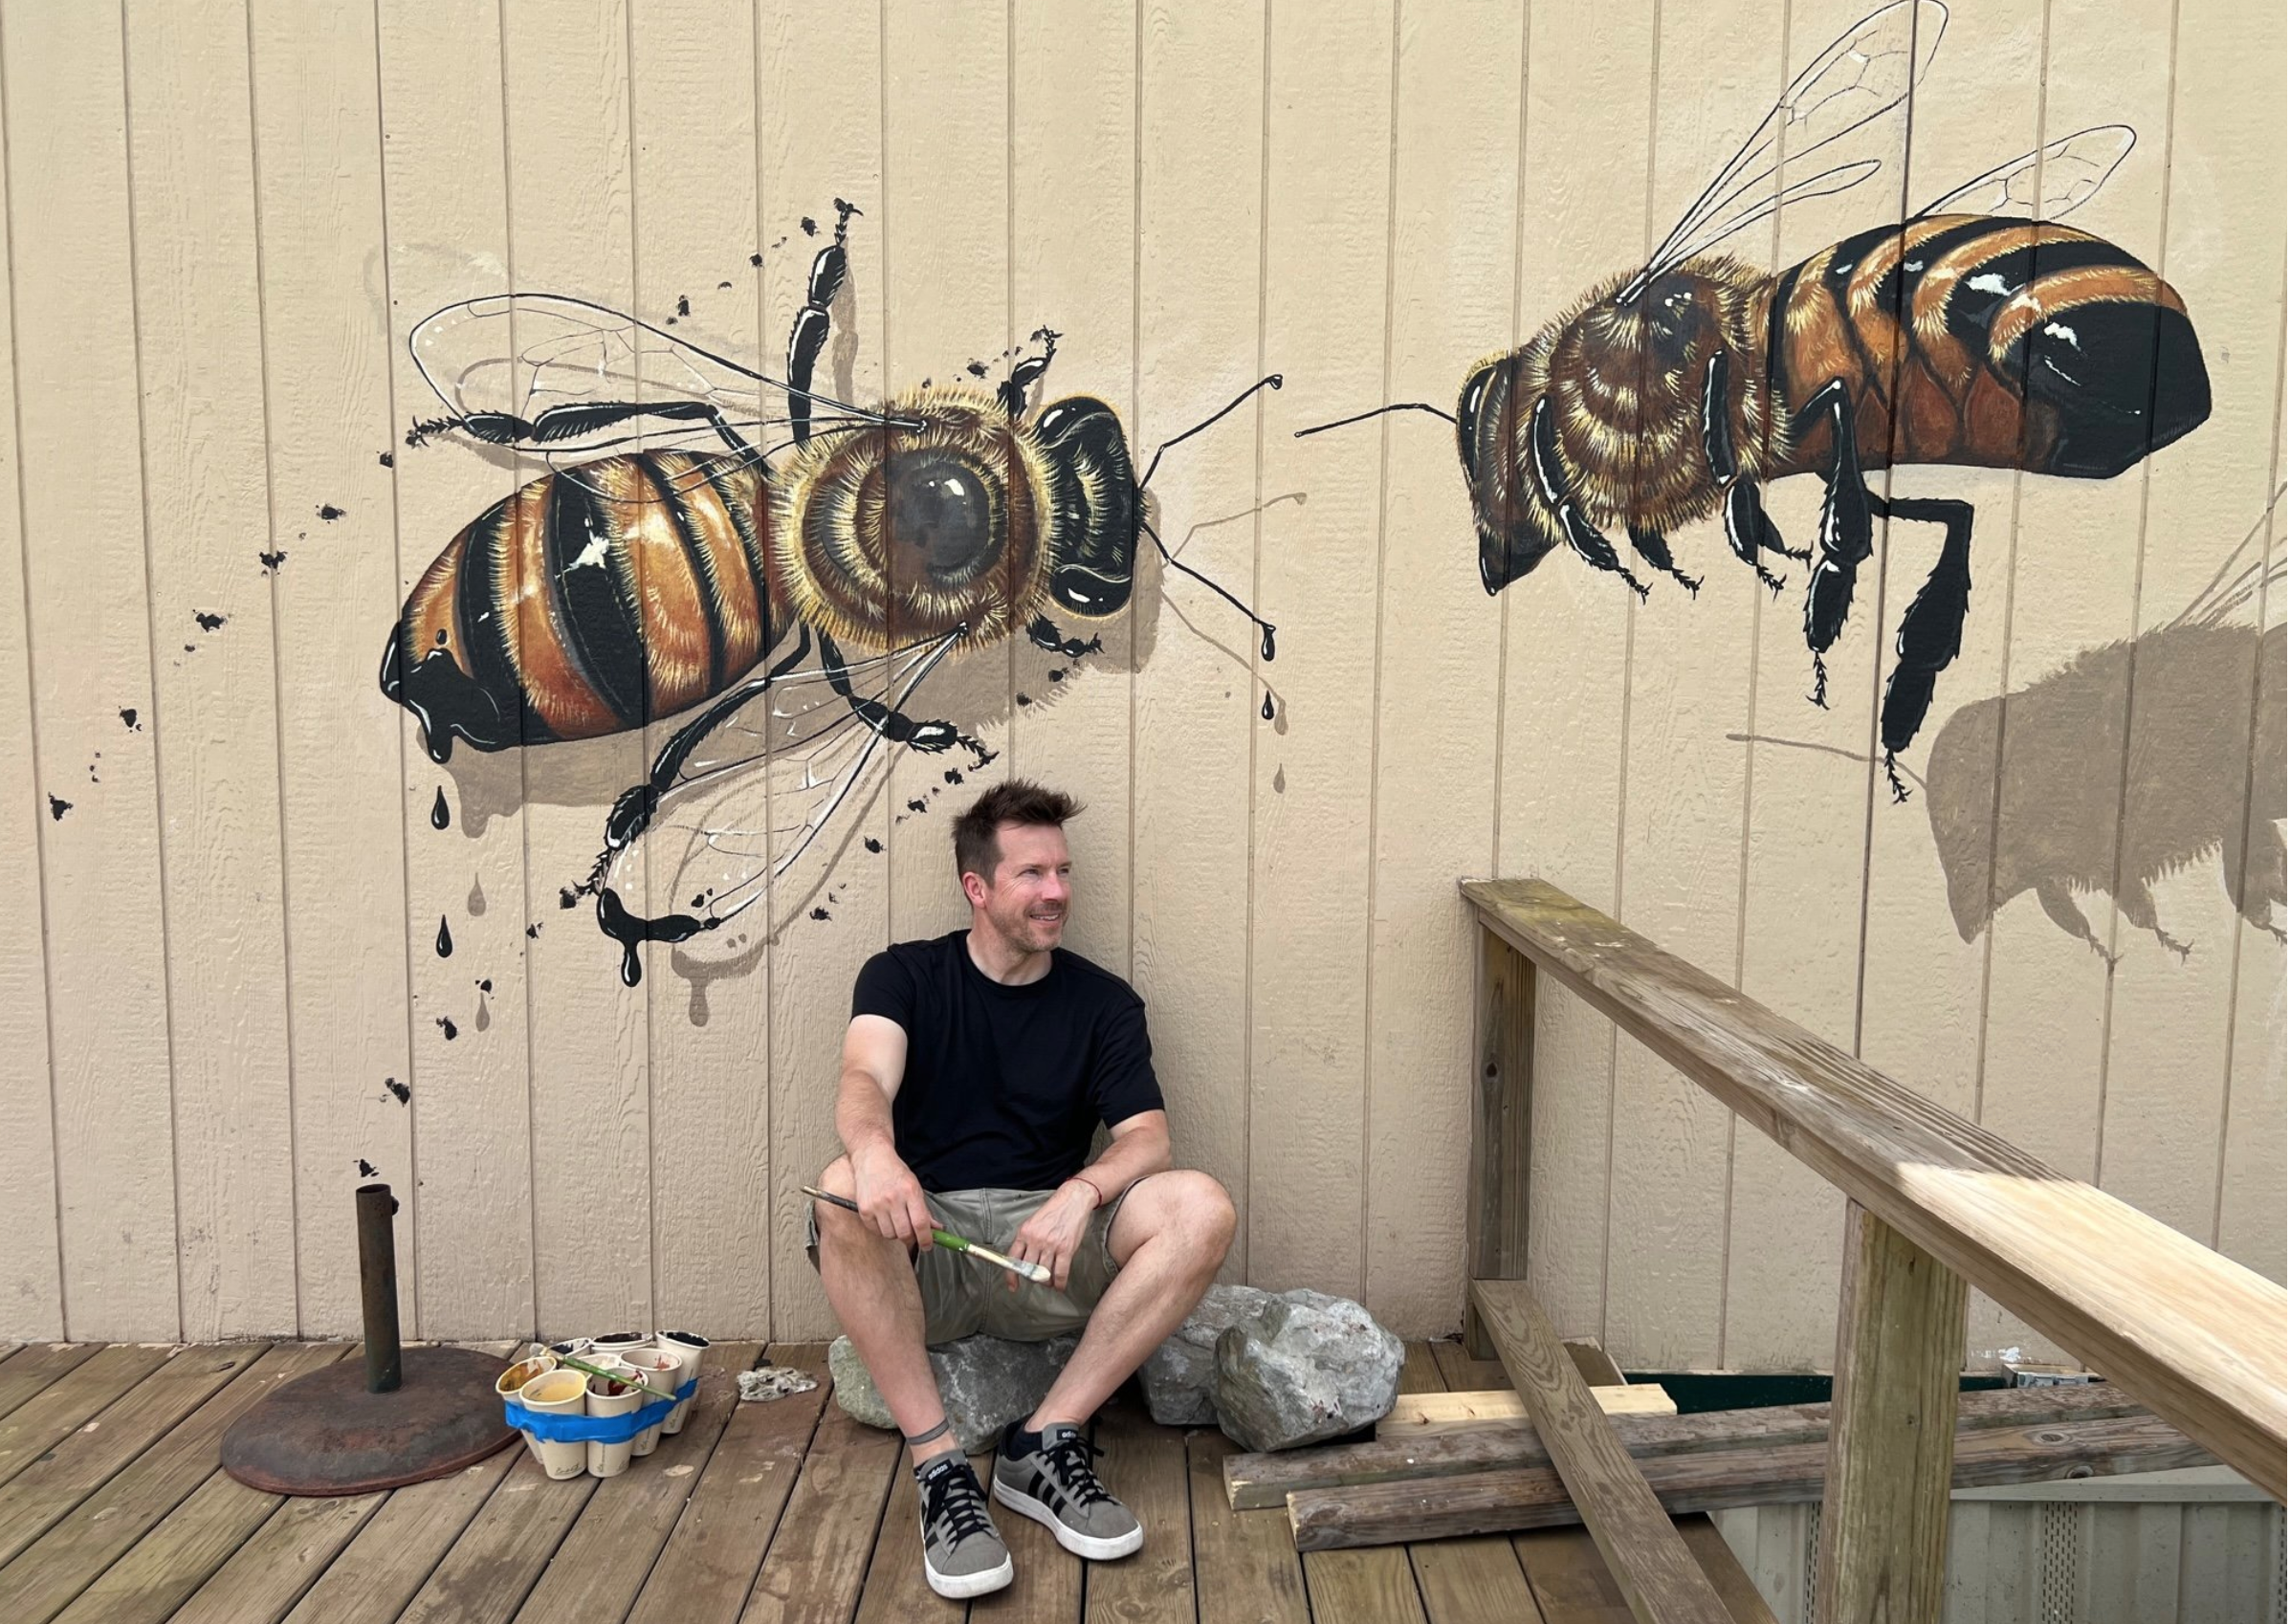
The Good of the Hive Mural @ St. James Parish- Scout Bee
Let's Save The Bees
Because bees are so important for a healthy environment, Matt Willey from The Good of the Hive introduces the importance of bees in our lives through his mural art.
Read More
Boutonniere design by Studio Sprig. Flower Farm Southern Pines at Cornerstone Farm. Photography by Karmapants
10 Ideas for an Eco-Friendly Event or Wedding
10 Ideas for an Eco-Friendly Event or Wedding
Read More
Sweet Occasions, Peddlers Village Flower Bar
How to Host A Flower Bar Event
How to host a DIY flower bar event in your home of event space.
Read More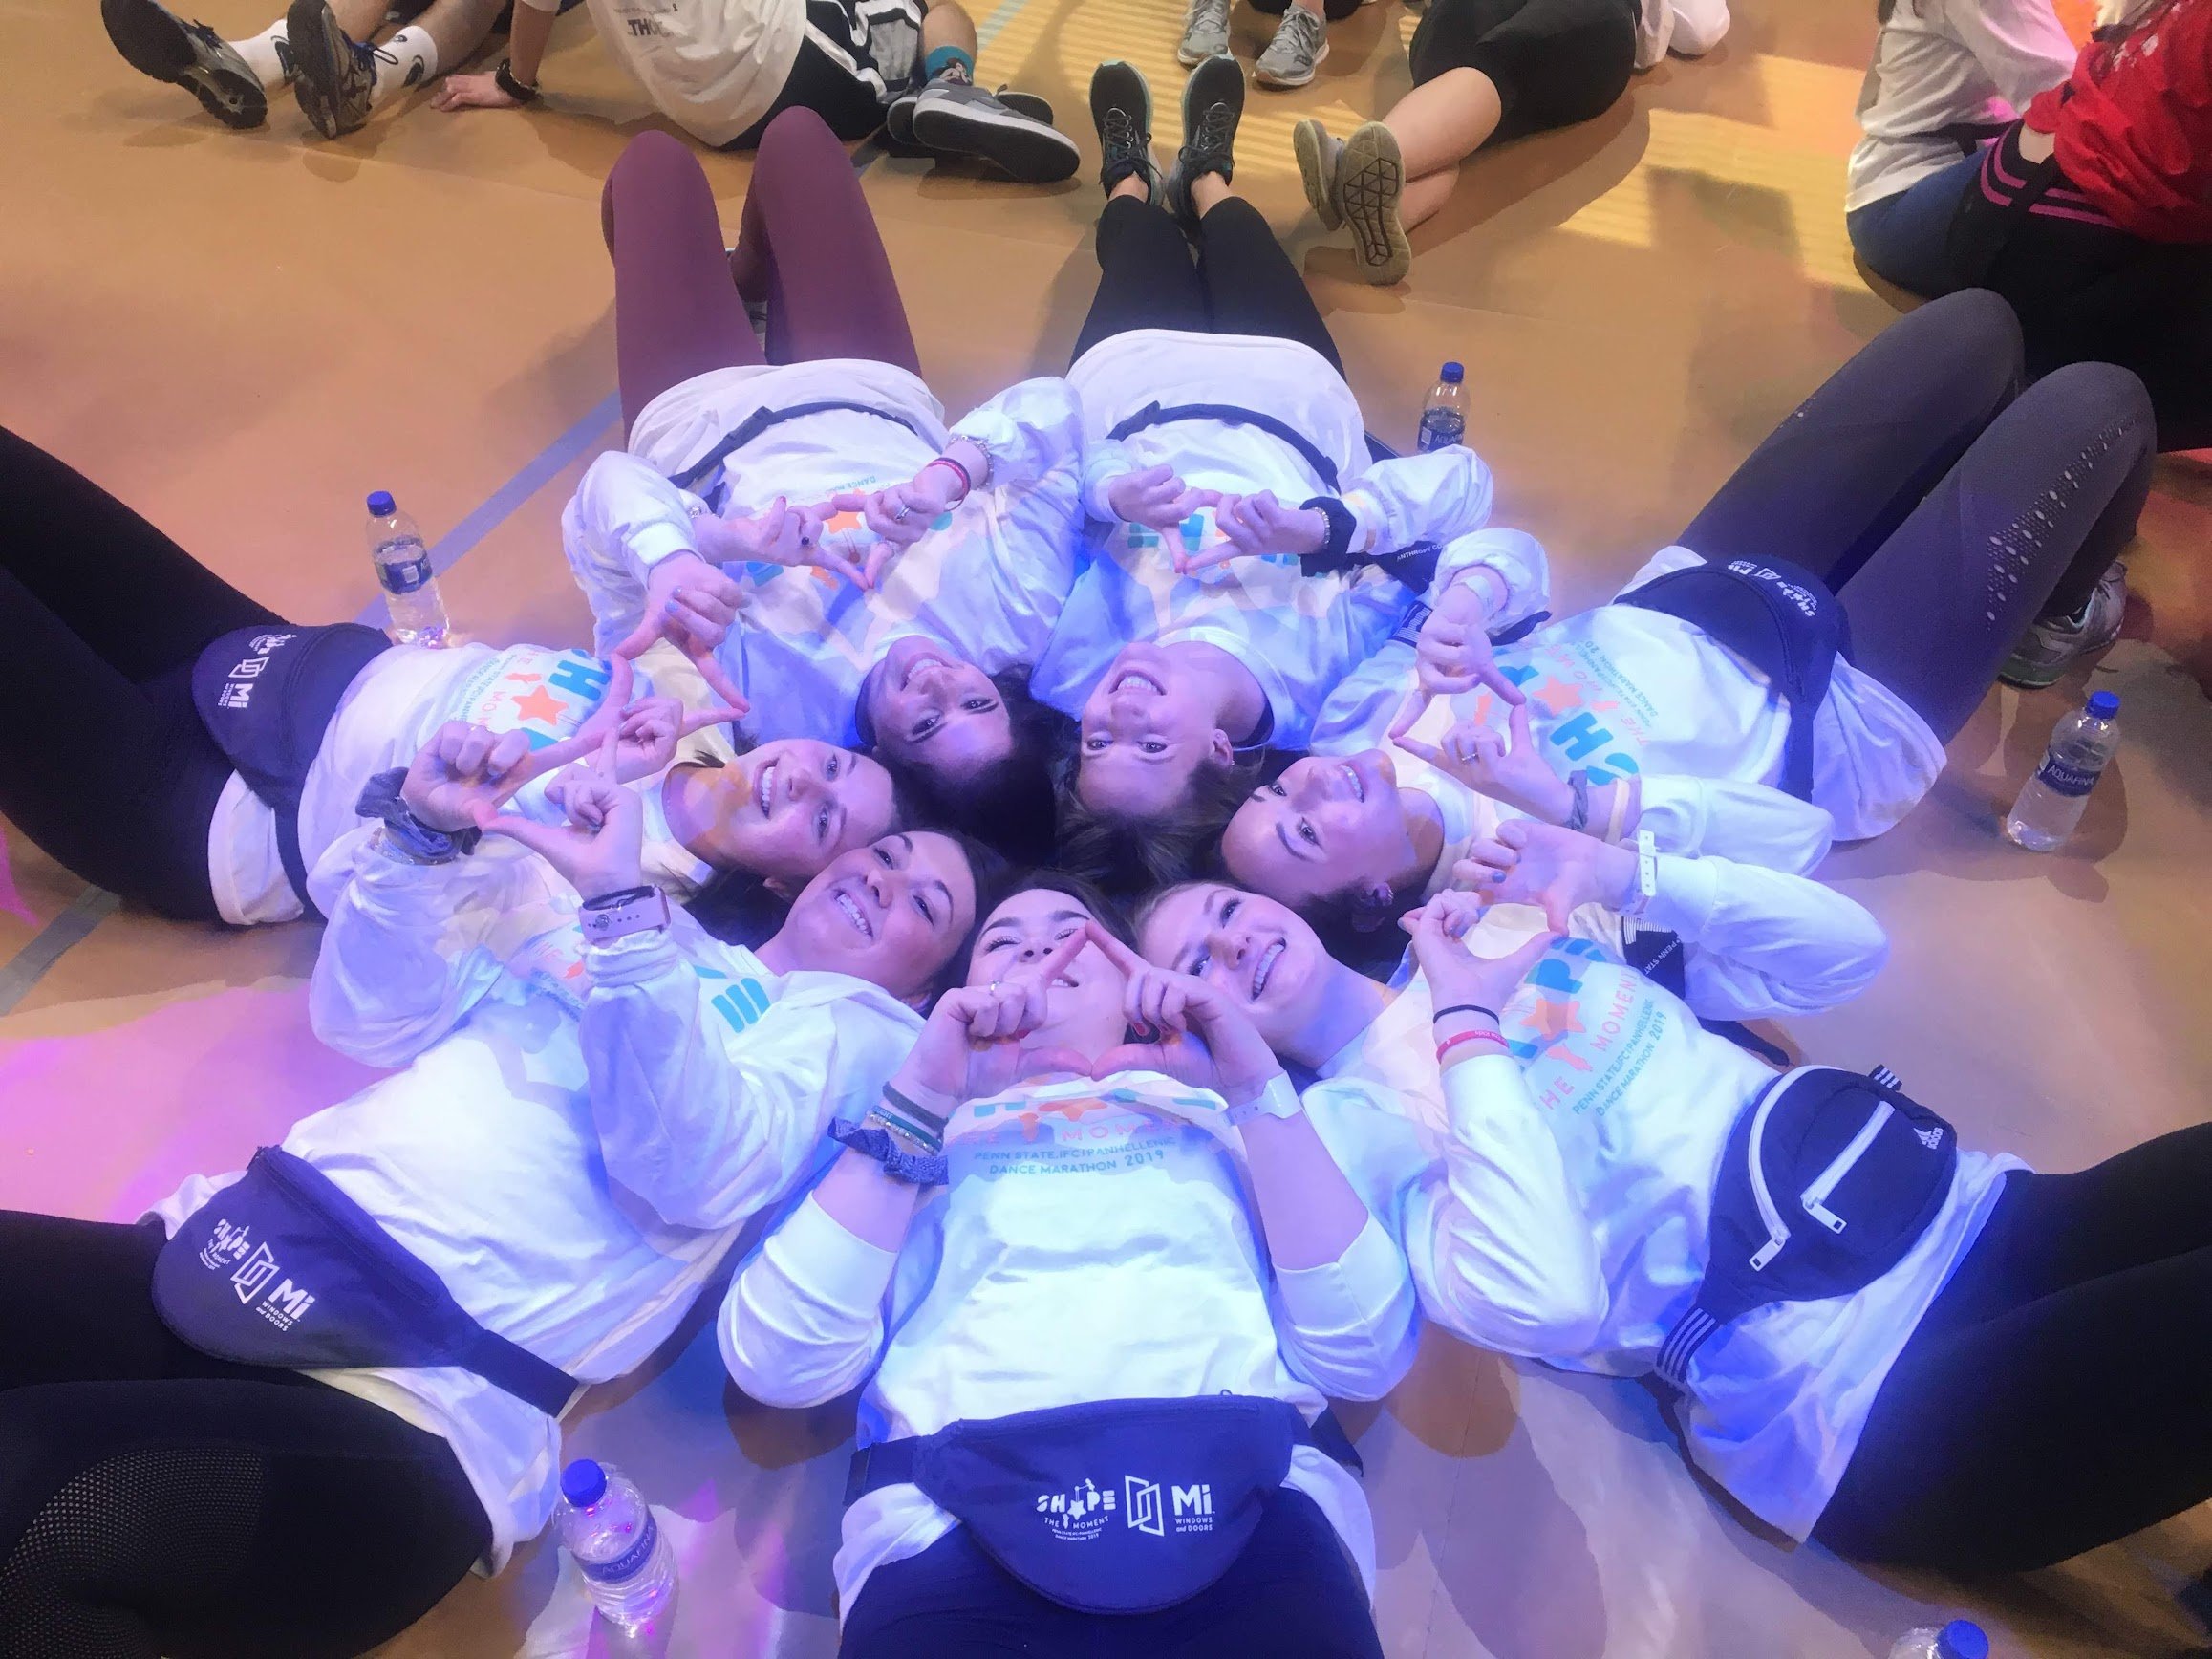
The Four Diamond hand symbol is seen a lot at THON.
A Great Way to Help Kids with Cancer (PENN STATE)

How to Create a Pretty Mini Bar with Items You Already Own
Creating a pretty mini bar with items you already own.
Read More
Lunch and Dinner -Studio Sprig Style Micro Blog
A micro blog about a vegan salad I create.
Read More
Kelly and Peter Jerrom.
A Family Tree Inspired Wedding Invitation
A hand-crafted wedding invitation based on a tree.
Read More
Studio Sprig by Kimberly Herb Drying Baskets
DIY Herb Drying Rack: Herb Drying at Home
This blog is about a DIY herb drying rack that I made at Windy Hill Farm.
Read More
Photo by John Arehart
Lambertville, Nj , A Funky, Cool Rivertown You Must Visit on Halloween.
Enjoy this blog about Halloween in Lambertville, NJ.
Read More
How to choose an interesting place to stay when you travel or go on vacation
This is about how to choose an interesting place to stay when you travel or go on vacation. Why it’s important to pay attention to the details and how to look for creativity everywhere.
Read More
Buttercream cake with a cake crown of rosemary, lavender and one bright pink anemone.
How to Create Cake Crowns and Mini Wreaths from Herbs and Flowers
Learn how to create a wreath or “cake crown” for your next event. Tools included.
Read More
Have you ever thought about creating a beautiful water feature?
Read about an Irishman and his quest to make the most beautiful backyard water features.
Read More